Monday, February 2, 2015

Making plain tees into something special


I made these 3 today, 2 are for my daughter's birthday and 1 is for me.
The first thing I did was to buy my tees and all the supplies. 
Supplies:
For the Gray top: 1 tank top tee, your size
1 pkg. of  extra wide double fold bias tape
Grosgrain ribbon, width of your choice around 1 yd
safety pin

For the 1st Black top: 1 tank top tee, your size.
1 1/4 yds of ecru lace
1 pin back
I small flower
Hot glue gun

For the 2nd black tee top: 1 tank top tee , your size
I pkg. wide organza ribbon
safety pin

You can choose any ribbon or trim you want to, just be use it can be washed either by machine or by hand.

Let's start:
1. Find the center in the back of the tee, and mark it with a pin.


2. Take your black bias and see how it is shorter on one side than the other? place the longer side to the back of the tee and the shorter side to the front and pin in place.

3. Once it is all pin around the neckline, sew in in place.
4. Make a bow, and with a safety pin add it to the front of the tee, anywhere you want it. 
You can use any size ribbon you want, and since it is easily removed, you can change your bow, with your outfits or to fit your mood.

Now on to Black Tee number 1
1.Mark the center back , like you did with the gray one.
2. Sew on the lace to the top of the neckline, I went back and did a zig zag ,close to the top to keep it the lace from curling out. 

The back is finished by turning the lace inward and sewing it in place.

If you want you can leave the tee just as it is, it looks pretty that way , but you can always embellish your tee.

Bows...retro or fancy it is all up to you.
you might even choose to make this pretty flower pin.

Here's how to make the flower pin. Check above for a list of what you need to make it.
1. Cut out a small circle out of cardboard, I used the price label which was on the tee, it was thick, and so it was a good choice for a backing.
Here is what I gathered to make my pin:

Cut out the circle.


The size of this circle is around 1 1/2 inches
 Cut the black fabric, at least 1/4 larger than the circle.
Do a running stitch close to the edge of the fabric.
Put the circle cardboard in the center of the fabric and pull to gather it close. 
Add a few stitches to the edge to make sure to your gathering does not come loose.

I used the remainder of what was left of the lace trim which I used for the top to make a pretty base for my flower.
I gathered the lace and pulled the tread tight to create a circle.

I sewed the ends close.

I hot glued the pin to the pretty side of the black base.

I glued the lace on top of the other side , than I glued the flower to the top of the lace. 


This is the finished pin.

Let's do Black tee number 2:

1. Find your back center.
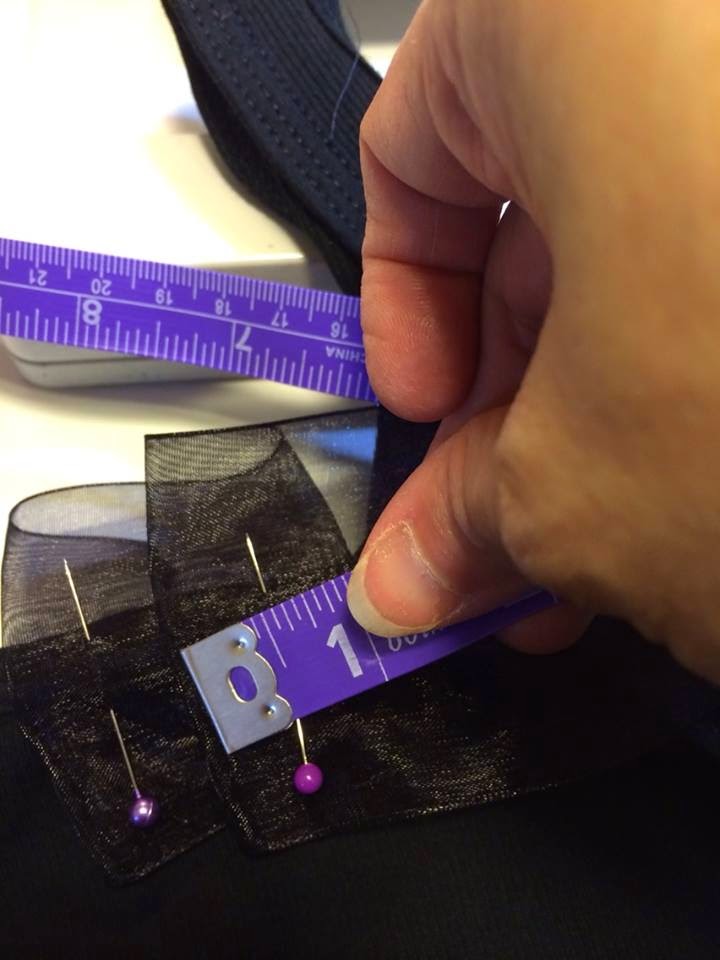
2.Take your Organza ribbon and start making pleats, I used a 1" pleat for all.


Go around , making pleats around the whole neckline.

3. Pin and adjust to your liking, this is how it should look once it is all pinned down.

4. Start sewing from your center back, be careful to catch all the edges, and keep them flat, if some do try to turn up use your finger to smooth it down.

5. This is how it will look once all the pleats are sewn down.

5. Now it looks great likes this, but if you are like me, you like to add a little fun to your clothes, so add a fancy bow...

In the front.


Or to the side.
This Tee can look especially elegant with the Organza bow cascading in the back of it.


Maybe give your top a cute retro look.

 Anyway you choose to trim your tee it will be great, and best of all it will be YOUR CREATION, uniquely yours.
 Please feel feel to ask any questions, I am new at tutorials so I hope this one is helpful.


Tuesday, January 13, 2015

I love using my crock pot, I use it all the time. It is nothing like working all day and when dinner time rolls along, I can smell my dinner waiting for me. This meal I am sharing with you is the easiest and best Pot Roast I have ever made. It only has a few ingredients and is put together in just minutes.


Mississippi Pot Roast is by far the best tasting pot roast in the world. We love it. 
Here is the recipe:
3 lb pot roast (I used a Blade Roast)
1 packet Ranch dressing mix
1 packet Au Jus mix
6 pepperoncini peppers
1 stick butter

In a 6-quart slow cooker, add all ingredients and cook on low for 8-10 hours. 
serve it over mashed potatoes.
Enjoy!


Valentine's Day is one of my favorite holidays. I love to show my family how much I love them, I would give my kids Valentine's and candy, I would write notes and show them acts of kindness and would encourage them to do it to their siblings and to their friends. I love to show my hubby how much I love him. I designed this apron's bib to look like the lid of a box of candy.


I hand sewed the flowers on and added pearls to the center of each one.
I used imported Swiss lace as well.


This is a full size apron, in a sweetheart Pin Up girl style. All seams are finished and it has a special little apron in front, with lots of special details.


This apron is a special , one of a kind apron, you will not see another one like it on Etsy, or anywhere, it is my creation. Let me know what you think of it. I would love to hear from you.


Valentine's day is almost here, are you thinking about spicing things up in your love life? How about meeting your sweetheart dressed only in this apron and a pair of heels?

Wearing an apron is a fun way to bring some excitement to any relationship, this apron is made from Bridal Satin and lingerie lace. On the waist band I added a special vintage roses band. It feels so soft and luxurious on your skin.

The back features a large bow. 


Here is a similar apron I made in the Peach color. You can find both aprons in my Etsy page, and you can find the link for my page on your right on this blog. They are $42.00 each.


Facebook

It use to be that I could post my stuff on Facebook and all of my fans could see them. But not today, with their new policy changes Facebook now only lets a handful around 3% of my fans to see my posts at any given time. So I no longer can rely on Facebook to help me with my business. And I am not the only one, other businesses big and small are in the same boat. Unless you pay , your fans can not see what you post. I am a small business and I can not afford to pay for each post I make, so I am now going to use this Blog, Pinterest, Twitter, Tumbler, and Google+ to let you know what I have made and where you can see and buy it. I hope you will still follow me as I make more items which will help you feel beautiful and help you have fun in your kitchens.
I also make baby and children's items too.

Monday, January 12, 2015

Domestic Diva Gloves

Who knew there were as many Domestic Diva's out there. I love to wear fun yet practical aprons and gloves in my kitchen, and I guess you do too. I always wanted fun, sexy rubber gloves to wear while doing the dishes or cleaning up the house doing those messy jobs, we all hate to do. I hated the look of those normal rubber gloves, and I wanted some fancy ones to wear , yeah I know what you are thinking, sexy, rubber gloves? Well why not? We all do dishes, and have to clean the toilet and I frankly hate those jobs, but maybe , just maybe when I where some thing cute I might feel better while doing it. So I created these "Diva Gloves".

I had seen similar rubber gloves at Walmart and Target, but frankly I wasn't too impressed with them, The part that was near your skin was plastic, and I felt those rubber gloves are hot enough without added more plastic on my skin, so I made my ruffles out of 100% cotton. 
My "Diva Gloves" are made using the best rubber Gloves I can find, and should last quite awhile, after wear just hang them up to dry.

Let's face it housework is boring, but your rubber gloves don't have to be.

Mimi's little darling's new vintage style swimsuit.

My granddaughter is going on her first cruise with her Mommy and Daddy, and so I decided she needed a new swimsuit. So I dug around my vintage patterns and found this pretty romper
 which I changed to have a sweetheart top instead of a plain straight top.
I then added her initials to the front of it.
I also lined the swimsuit and added two ruffles to the skirt part, and added a fun large bow to the back.
I love the results. I made a matching old fashioned sunbonnet to protect her from the sun. I am please in how well it fit her and how cute she looks in it.